
Browse documentation
Adding knowledge
How to add a document to the Knowledge Hub by pasting text, from a URL or by uploading a file, how tags are suggested, and what the pending, embedded and failed statuses mean.
A document your agents can read is worth more than ten they cannot
Agents answer from what is in your Knowledge Hub. Your website gives them a start (see Bootstrapping from your website), but the material that makes them useful usually lives elsewhere: a sales deck, a pricing sheet, a call transcript, a competitor's one-pager. This page shows how to add it, and how to tell whether your agents can actually read it.
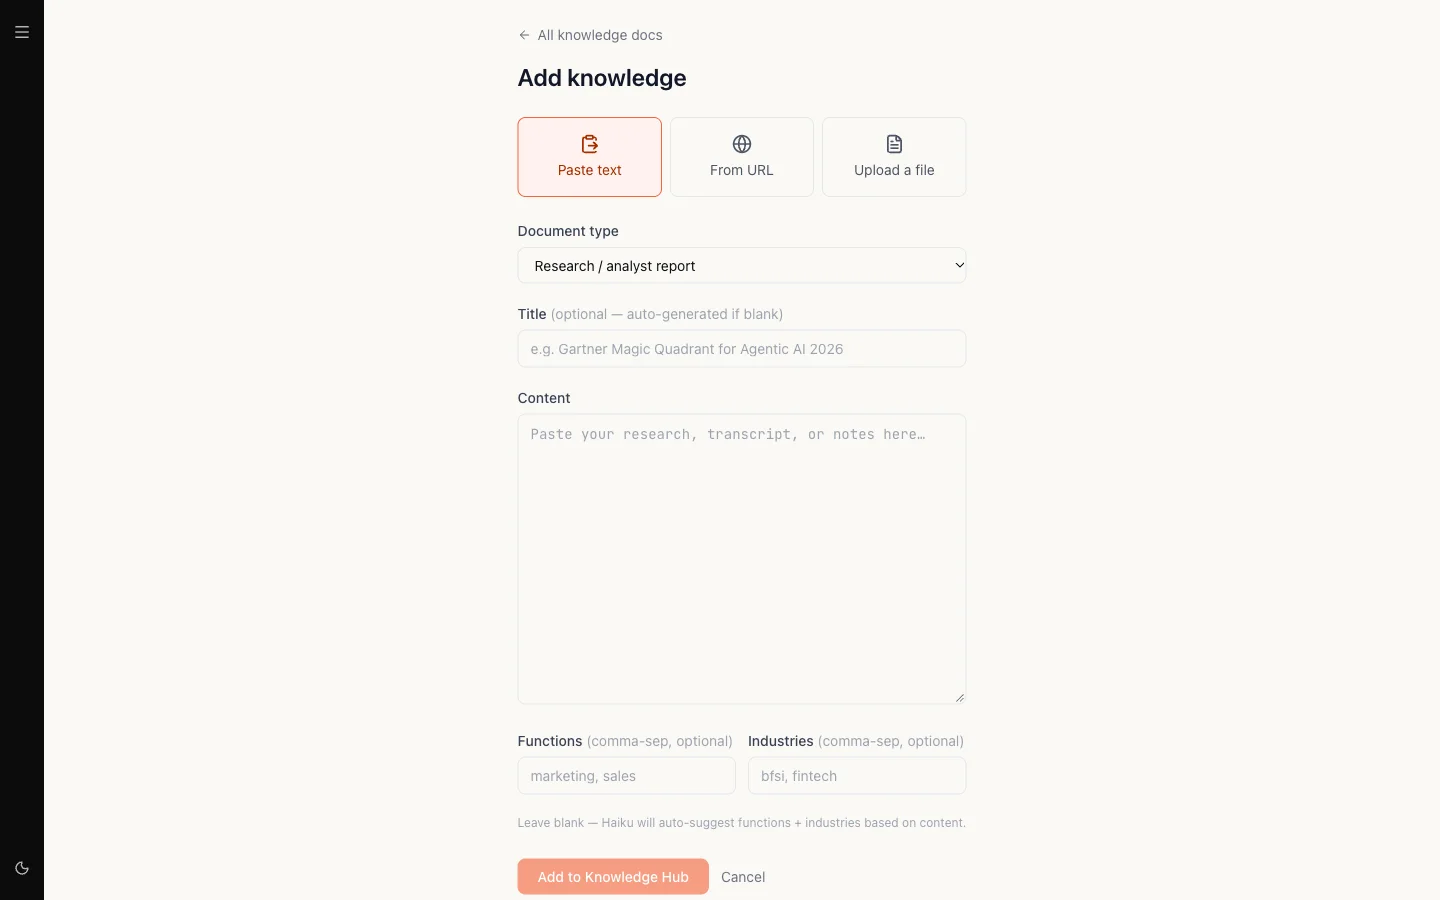
Open the Knowledge Hub and choose to add a document, or go straight to nagent.ai/admin/knowledge/new. The screen is titled Add knowledge.
Step 1. Choose how to add it
Three buttons sit across the top.
| Option | Use it for | What happens |
|---|---|---|
| Paste text | Notes, transcripts, anything you can copy | The text is stored as it is |
| From URL | An article, a whitepaper, a public page | Nagent fetches the page and keeps the article text |
| Upload a file | Decks, documents, sheets, PDFs | Nagent reads the text out of the file |
Files can be Word (.docx), PowerPoint (.pptx), spreadsheets (.xlsx, .xls, .csv), PDF, Markdown, plain text or JSON, up to 25 MB. Older formats such as .doc, and Apple's Keynote and Pages files, are refused with a message naming the format; save them as one of the above first.
A PDF must carry real text. There is no OCR, so a scanned PDF that is only pictures of pages is refused with "Could not extract any text from this PDF." Paste the content instead, or export a text PDF.
Step 2. Pick the document type
Document type tells agents what kind of material this is. The options are:
- Research or analyst report
- Competitor doc
- Sales deck or one-pager
- Customer interview or call transcript
- Product doc or spec
- Other paste
- URL article
- PDF upload, Word document, Presentation, Spreadsheet, and Plain text, markdown or json
The type follows what you are doing. From URL sets it to URL article, and picking a file sets it from the file's format. You can change it afterwards, and it is worth doing: a presentation that is really your sales one-pager is better filed as Sales deck or one-pager.
Step 3. Title and content
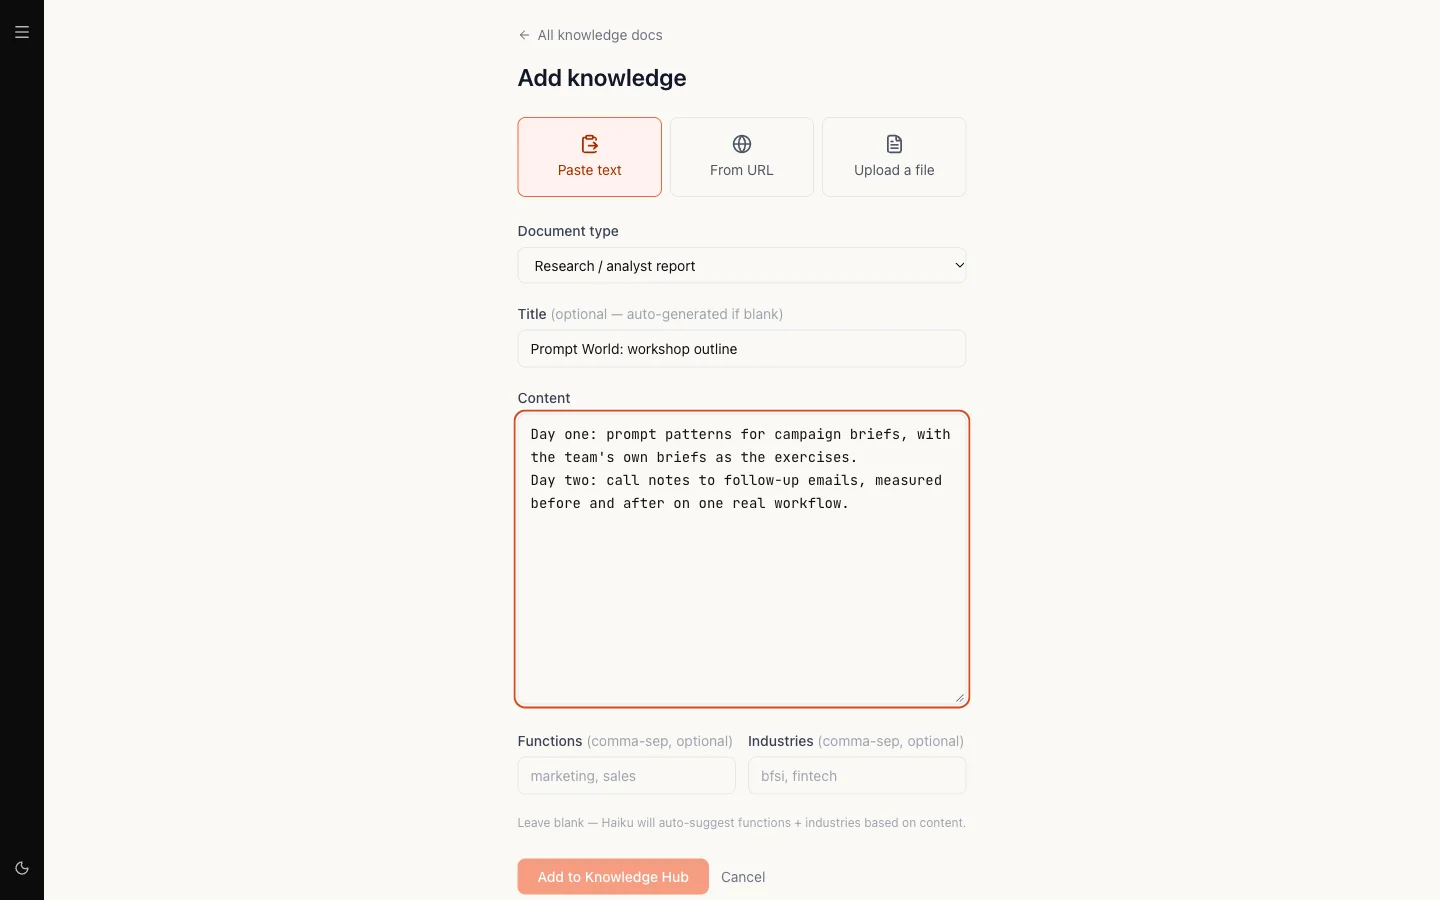
Title is optional. Leave it blank and Nagent takes one from the content, for example the page or document's own title.
Then paste the text, enter the URL, or choose the file.
Step 4. Tags: functions and industries
Two optional fields take comma-separated tags:
- Functions, such as
marketing, sales - Industries, such as
bfsi, fintech
You do not have to fill them in. Nagent reads the start of the document and suggests functions, industries and topics on its own. Anything you type is kept, the suggestions are added to it, and functions and industries are stored in lower case. If the suggestion step fails, the document is still saved with whatever you typed.
For Prompt World, the transcript of a discovery call with a head of marketing
might be filed as Customer interview or call transcript, with functions
marketing, sales enablement.
Step 5. Add it
Select Add to Knowledge Hub. The button reads "Extracting + embedding" while Nagent reads the content and saves it, then opens the new document's page.
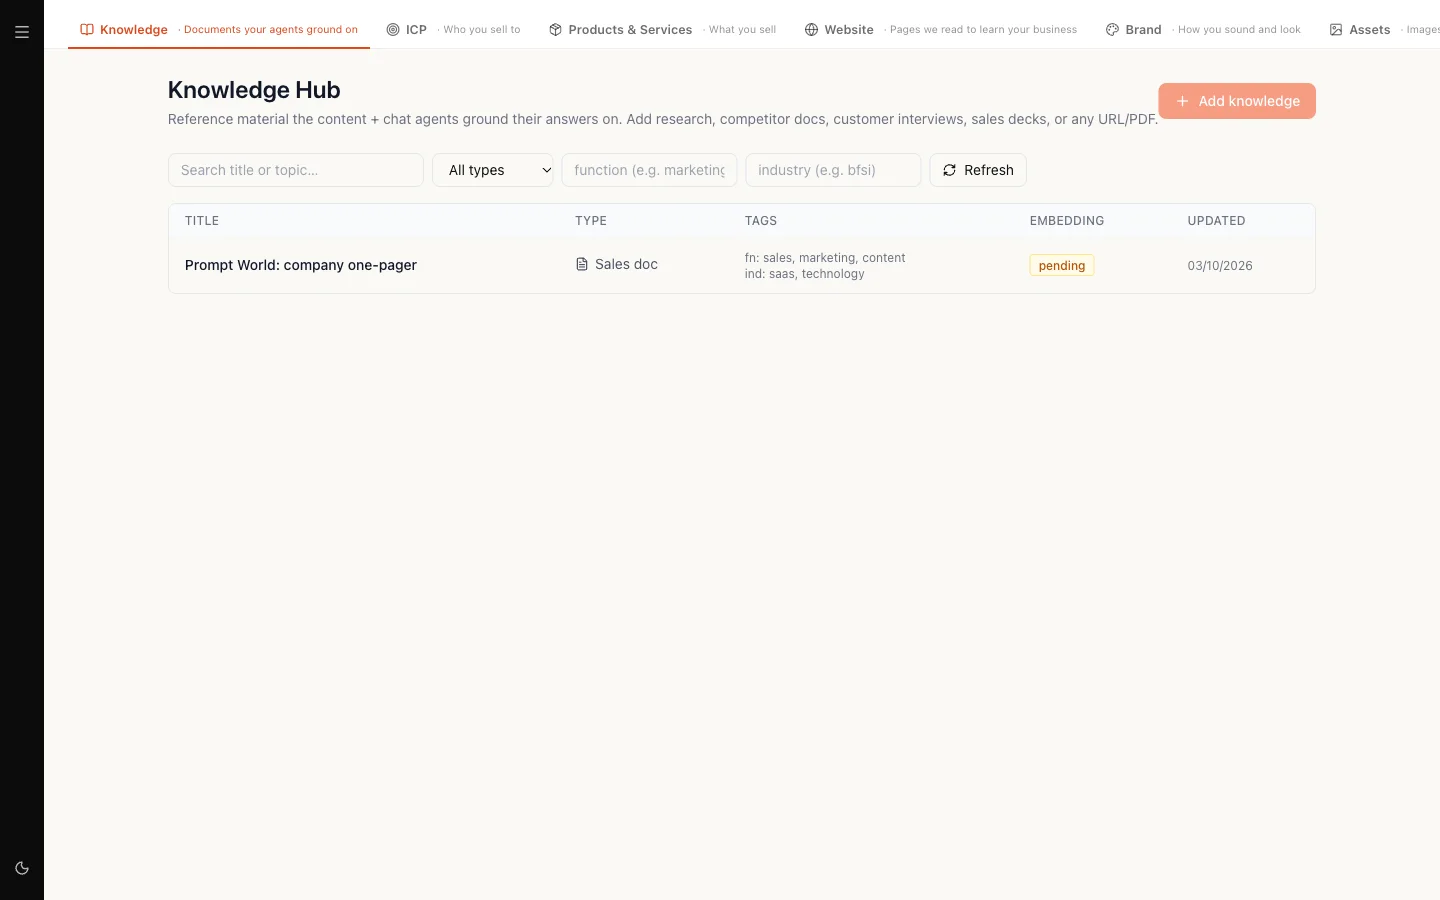
If the button stays on that label for more than a minute, open the Knowledge Hub list. The document has usually been saved and is shown there as pending; there is no need to add it again.
What the status means
Saving a document and making it readable are two steps. After the save, Nagent indexes the text in the background: it splits it into passages and embeds them so agents can retrieve the relevant ones. The status in the list and on the document page tells you where that stands.
| Status | What it means | Can agents read it? |
|---|---|---|
| pending | Saved, indexing not finished | Not yet |
| embedded | Indexed. The list shows how many chunks | Yes |
| failed | Saved, but indexing did not work | No |
A document usually moves from pending to embedded within moments. If it stays pending, open it and select Re-embed.
"Failed to index"
A failed document is stored and unreadable. Your agents behave as though it was never added. The document page shows Last embed failed with the reason.
To fix it:
- Open the document from the list.
- Select Re-embed to try again.
- If it fails again, the content is the usual cause. Check that the text on the page is real text and not empty, edit it if needed, and save. A change to the content re-indexes it on its own.
- If you no longer need it, select Archive. Archiving removes its passages from the index.
Our logic: a failed source counts against you
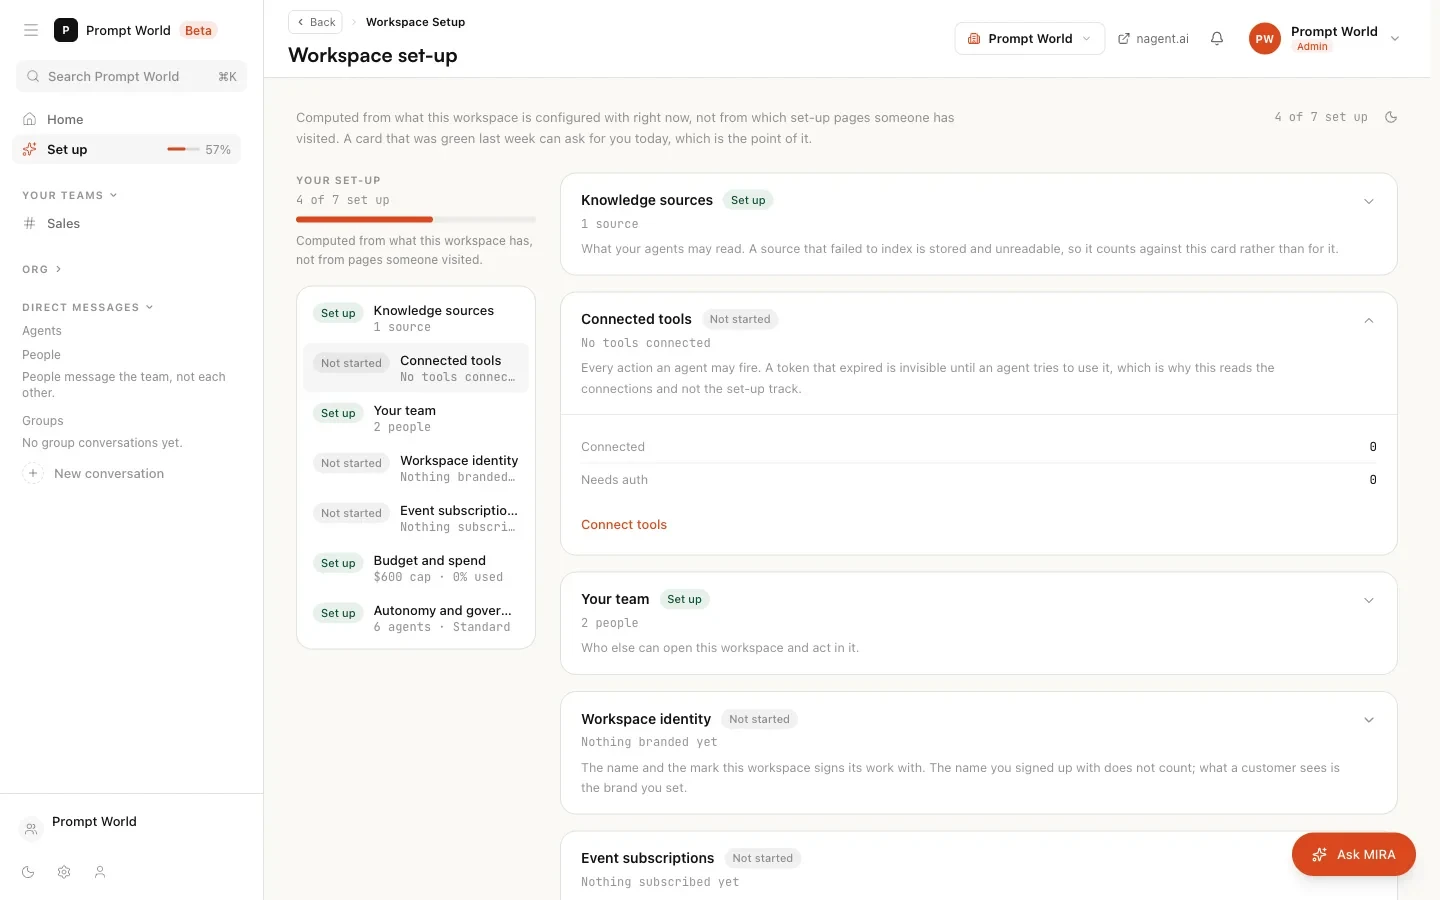
On Workspace set-up, the Knowledge sources card counts documents and assets, and has a row for Failed to index. If any source failed, the card shows "N sources · N failed to index" and asks for your attention, even if you have added plenty.
That is deliberate. A count of rows would say you are done. But a source that failed is one your agents cannot see, and the card is there to tell you what they can read, not what you uploaded.
Editing a document later
The document page lets you change its title, its functions and industries, and its content. Changing the content re-indexes it. Archive takes it out of what agents can read.
Who can do this
Reading the Knowledge Hub needs knowledge read permission, and adding or editing documents needs knowledge write permission. A workspace admin holds both.
Where to go next
- The Knowledge Hub: how the three levels of knowledge combine when an agent works.
- Bootstrapping from your website: load your site's pages in one go.
- Products and services: decks and price lists can also become offerings.
- Workspace set-up: the other six cards.