
Browse documentation
Connecting a tool
How to connect a tool such as Gmail, HubSpot or Slack, choose which of its actions your agents may call, narrow each action to the agents that need it, and keep the connection healthy.
Connecting a tool opens only the actions you allow
The Knowledge Hub tells your agents what is true. Connected tools let them act: read your CRM, draft in your mailbox, post in your team chat. Connecting a tool does not hand an agent everything that tool can do. You choose its actions one at a time, you choose which agents may call each one, and an action with consequences still waits for a person until the agent's level allows it.
This page is the procedure. For what kinds of tools there are and how agents use them once connected, see third-party tools.
Where to connect
There are two ways in.
- Connect your tools is the quick start on a new workspace: a grid of common tools, each with Connect. If a team you installed needs a tool, a panel headed Your teams need these lists it, because until it is connected the agents that use it stay switched off. See your first hour.
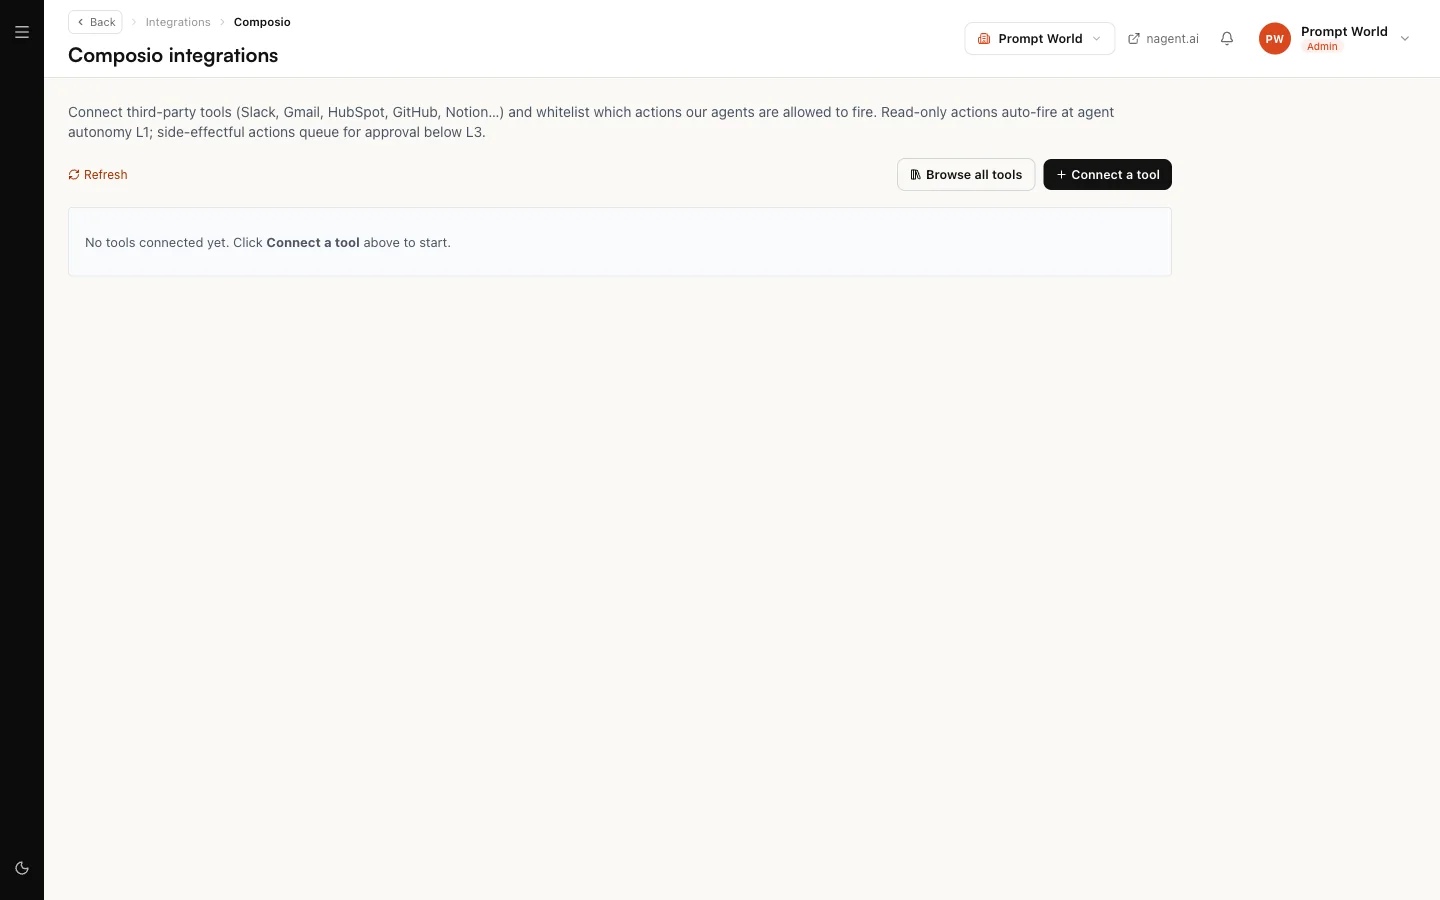
- Composio integrations is where every connection is managed, and the only place you choose actions. The Integrations page links to it.
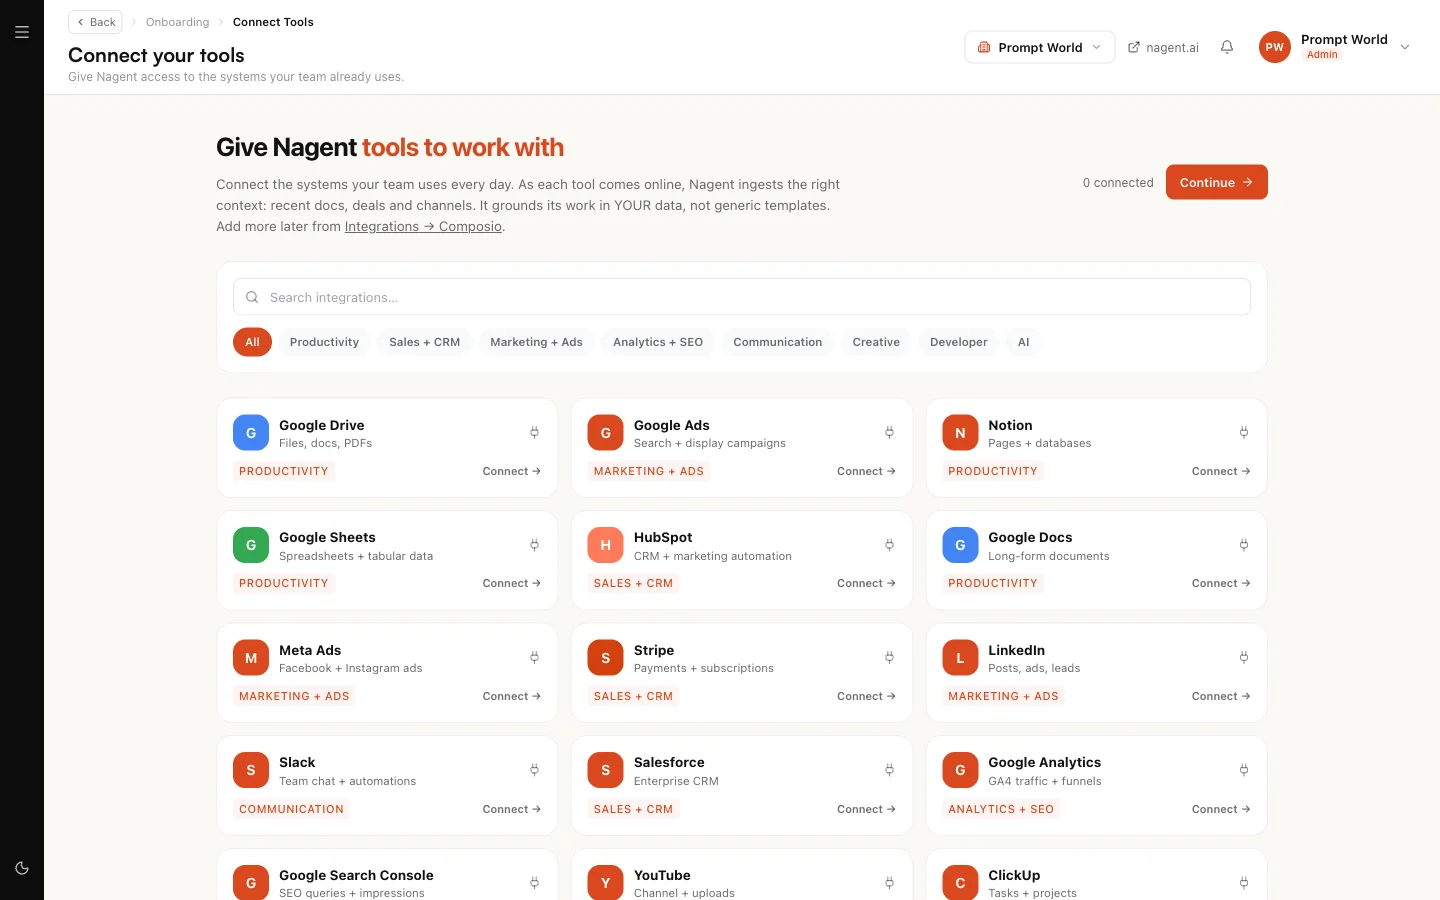
A tool you connect on either screen is the same connection, so you can start on the first and choose its actions on the second.
Step 1. Find the tool
On Composio integrations, select Connect a tool and search by name, or select Browse all tools for the full list.
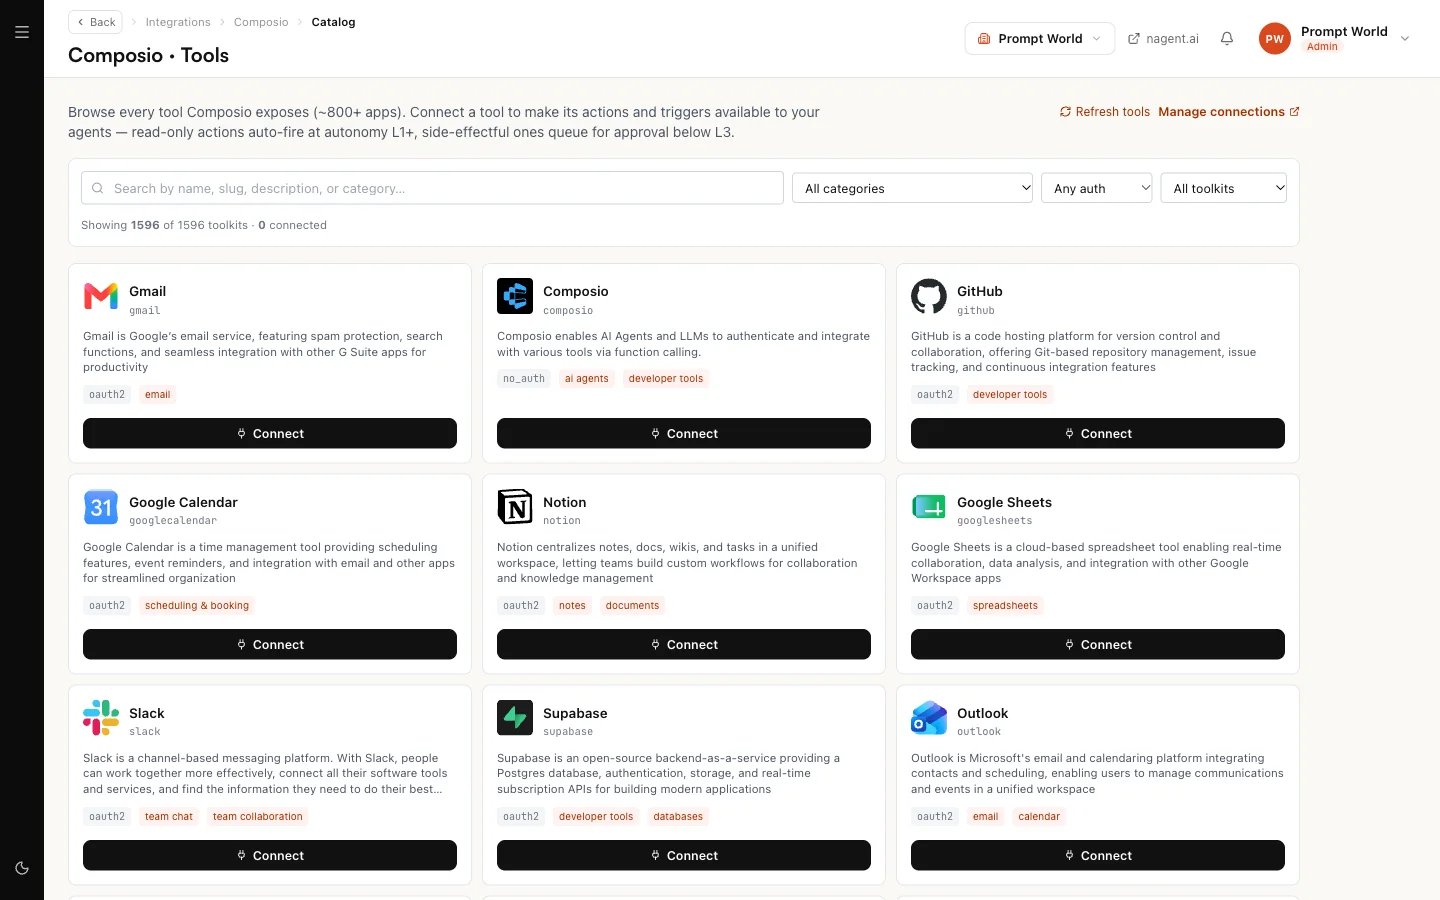
Browse all tools opens Composio · Tools. Search by name, slug, description or category, and narrow by category, by how the tool signs in, or to connected or not-connected tools. Each card shows the tool, what it does and how it signs in.
Step 2. Sign in to the tool
Select Connect on the tool. Most tools send you to their own sign-in page to approve access, then back to Nagent. Sign in with the account your agents should use, and only one you are authorised to connect.
Some tools need a detail before sign-in can start, such as an ad account ID. If Connect a tool cannot collect it, the page says so and asks you to connect from Browse all tools, which asks for it.
Back on Composio integrations, the tool appears in the list on the left with its status.
| Status | What it means | What to do |
|---|---|---|
| ACTIVE | Connected and usable | Nothing |
| INITIATED | Sign-in started, not yet confirmed | If you finished signing in, select Refresh status |
| EXPIRED, FAILED or DISABLED | The connection has stopped working | Connect it again; it does not recover on its own |
Until a connection is ACTIVE, its actions do not fire and no trigger can be switched on for it. The page says this in a banner on the tool.
Step 3. Choose the actions
Select the connected tool. Under Available actions, every action the tool offers is listed with its name and what it does. Nothing you have not chosen is available to an agent.
- Tick each action an agent needs. Each tick saves at once.
- Leave anything destructive unticked unless a real piece of work needs it. For Gmail, an agent that drafts replies needs to fetch and draft, not to delete.
- Select all and Clear all change the whole list. Clearing asks you to confirm, because agents lose every action at once.
Ticked actions move to Whitelisted actions at the top. An action that changes something outside Nagent is marked side-effect, so you can see at a glance which ones carry consequences.
Actions your teams asked for
When you connect a tool that one of your installed teams declares, the actions that team needs are ticked for you and narrowed to that team's agents. Removing the team removes those grants. An action you ticked by hand is yours: installing or removing a team never takes it away.
Step 4. Narrow each action to the agents that need it
Each whitelisted action shows who may call it. A new action reads every agent, highlighted as a warning, because that is the widest setting: every agent in your workspace can call it.
- Select every agent on the action.
- Tick the agents allowed to call it.
- To widen it again, select clear · back to every agent.
Once narrowed, no other agent can reach that action, whatever else it has been given.
What fires on its own, and what waits
A whitelisted action fires when an agent decides to call it, during a conversation or a run. Whitelisting never makes anything fire on a schedule. Whether it runs straight away depends on the action and on the calling agent's level.
| Action | Runs on its own | Otherwise |
|---|---|---|
| A read, such as fetch, list or search | Yes | |
| Anything that creates, changes, sends or deletes | At L4 Senior and above | Waits for a person |
| A post, comment or reply on a social platform | Never | Always waits for a named person |
The page's own note puts the side-effect bar at L3. It counts levels from L0, as an agent's Autonomy pane does, so its L3 is L4 Senior here. See autonomy and governance.
On a new workspace, every e-mail NORA sends waits for a person's approval, whatever her level shows. Approvals wait on Actions; see approvals and the Inbox.
Triggers and dispatch
Below the actions, Triggers lets a connected tool start work in your workspace when something happens there, such as a new e-mail or a new row. Select Enable trigger and pick the event; the connection must be ACTIVE first. How events reach agents is in triggers and webhooks.
Dispatch sets how actions are sent to the tool, REST or MCP. Leave it on REST unless you have a reason to change it.
Looking after a connection
- Refresh status asks the tool again whether the connection is healthy. If the tool reports something different from what the page shows, the page says so and Refresh status writes the live value back.
- Disconnect removes the connection after you confirm. Agents lose every one of its actions straight away.
- The Connected tools card on Workspace set-up turns to Needs you when a connection needs re-authorising, so an expired tool does not go unnoticed until an agent tries to use it.
Our logic
A tool connected with everything switched on is a tool every agent can use in every way, and nobody chose that. So each action is a decision, each one names the agents allowed to call it, and the widest setting is shown as a warning rather than a default. Start narrow and widen when real work needs it.
Who can do this
Viewing connections needs tools read permission. Connecting, disconnecting, changing dispatch, editing the whitelist and enabling triggers need tools write permission. A workspace admin holds both. Without write permission the page opens read-only and says so.
Where to go next
- Third-party tools: the kinds of tools and how agents use them.
- Triggers and webhooks: events that start agent work.
- Email and integrations: the address your workspace sends from.