
Browse documentation
Email and integrations
How to send your workspace's outbound email from your own domain with a Resend key, what happens until you do, and what else lives on the Integrations settings page.
Mail your agents send should come from you
Email your workspace sends through Nagent, from its agents and workflows, goes out through an email service. Until you add your own account, Nagent sends it through a shared Nagent account, and recipients see a Nagent address as the sender. That is fine for trying things out. For anything a customer of yours will read, you want it to come from your own domain.
The Integrations page in Settings is where you set that up. Go to Settings, then Integrations, or open nagent.ai/admin/settings/integrations.
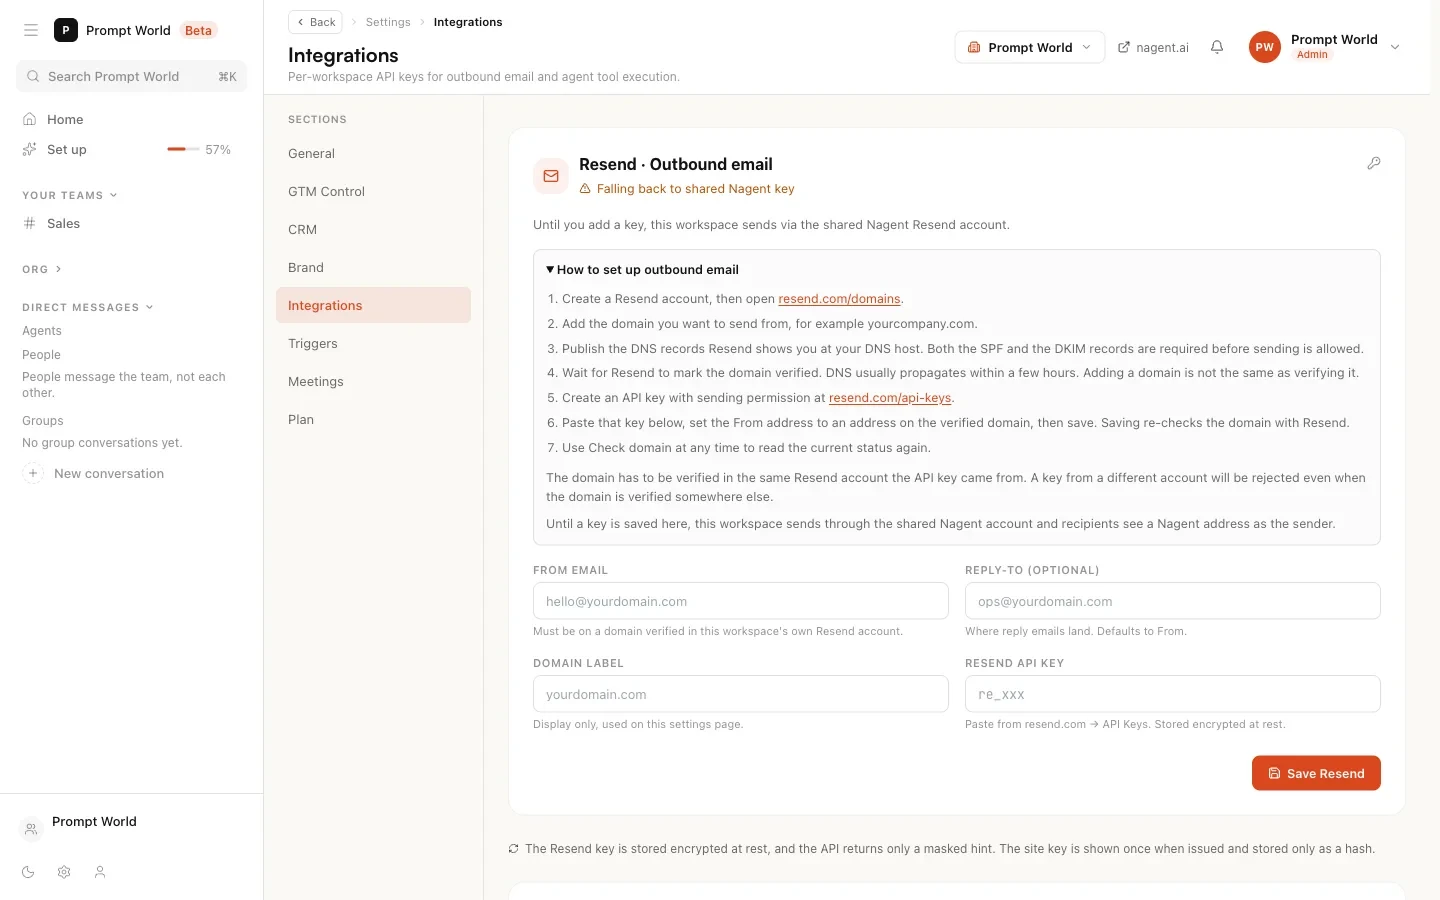
The outbound email card
The card is titled Resend · Outbound email. Resend is the email service Nagent sends through, and you bring your own Resend account.
Under the title, the card tells you where you stand:
- Falling back to shared Nagent key: no key is saved. "Until you add a key, this workspace sends via the shared Nagent Resend account."
- Workspace key configured, with the last characters of the key: your own account is in use.
Setting up your own sending domain
The card opens a guide, How to set up outbound email, until a key is saved. The steps, as the page gives them:
- Create a Resend account, then open resend.com/domains.
- Add the domain you want to send from, for example
promptworld.example. - Publish the DNS records Resend shows you at your DNS host. Both the SPF and the DKIM records are required before sending is allowed.
- Wait for Resend to mark the domain verified. DNS usually propagates within a few hours. Adding a domain is not the same as verifying it.
- Create an API key with sending permission at resend.com/api-keys.
- Paste that key into the card, set the From address to an address on the verified domain, then save. Saving re-checks the domain with Resend.
- Use Check domain at any time to read the current status again.
One rule catches people out: the domain has to be verified in the same Resend account the key came from. A key from a different account is rejected even when the domain is verified somewhere else.
The fields
| Field | What to put in it |
|---|---|
| From email | The sender address, on your verified domain. For example hello@promptworld.example |
| Reply-To | Optional. Where replies land. Defaults to the From address |
| Domain label | Display only, shown on this page |
| Resend API key | The key from step 5. It starts re_ |
Select Save Resend. The page confirms the save and shows the result of the domain check.
Reading the domain status
After a save or a check, a line under the title says what Resend reported:
| Status | What it means |
|---|---|
| Verified | The domain can send |
| Pending | Added to Resend, DNS still propagating |
| Not started | Added, but verification has not been started in Resend |
| Failed | The DNS records are missing or wrong |
| Partially verified or partially failed | At least one record is not right yet, so sending is not enabled |
| Sending disabled | Verified, but sending is switched off on it in Resend |
| Not found | The domain is not in the Resend account this key belongs to |
| Check failed | The check did not complete; the key may be revoked or from another account |
The line also says when the domain was last checked.
Changing or removing the key
To rotate the key, paste a new one and save. Remove key deletes it, and the workspace goes back to the shared Nagent account straight away.
Our logic
Mail from an unverified domain lands in spam or is refused, and mail from someone else's domain misleads the person who reads it. So the page checks the domain against the account behind your key every time you save, and says plainly what is wrong instead of letting sends fail silently later.
The key is stored encrypted, and the page only ever shows a masked hint of it.
Your own mailbox for CRM email (Beta)
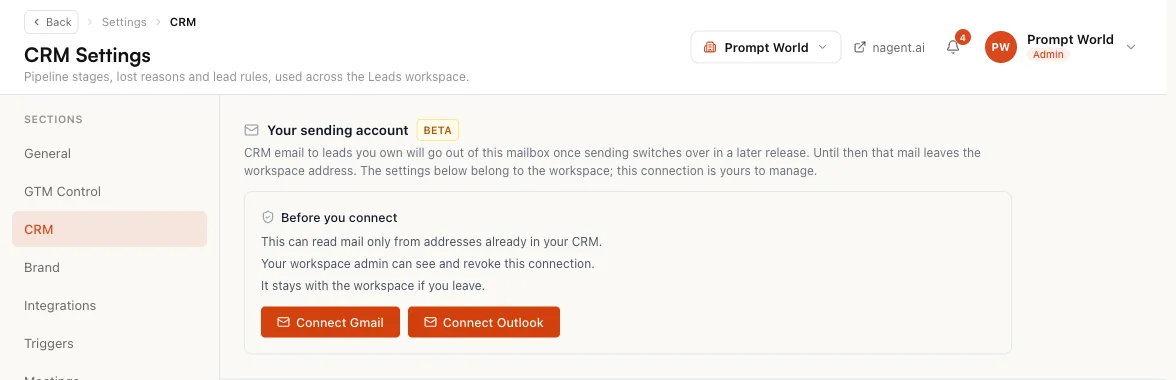
Separately from the workspace sender, each person on your team can connect their own mailbox for CRM email to the leads they own. That lives on Settings, CRM, under Your sending account, with Gmail and Outlook offered. It is marked Beta, and the card says so plainly: CRM email will go out of that mailbox "once sending switches over in a later release. Until then that mail leaves the workspace address." The workspace address is the one you set up above.
Tool keys
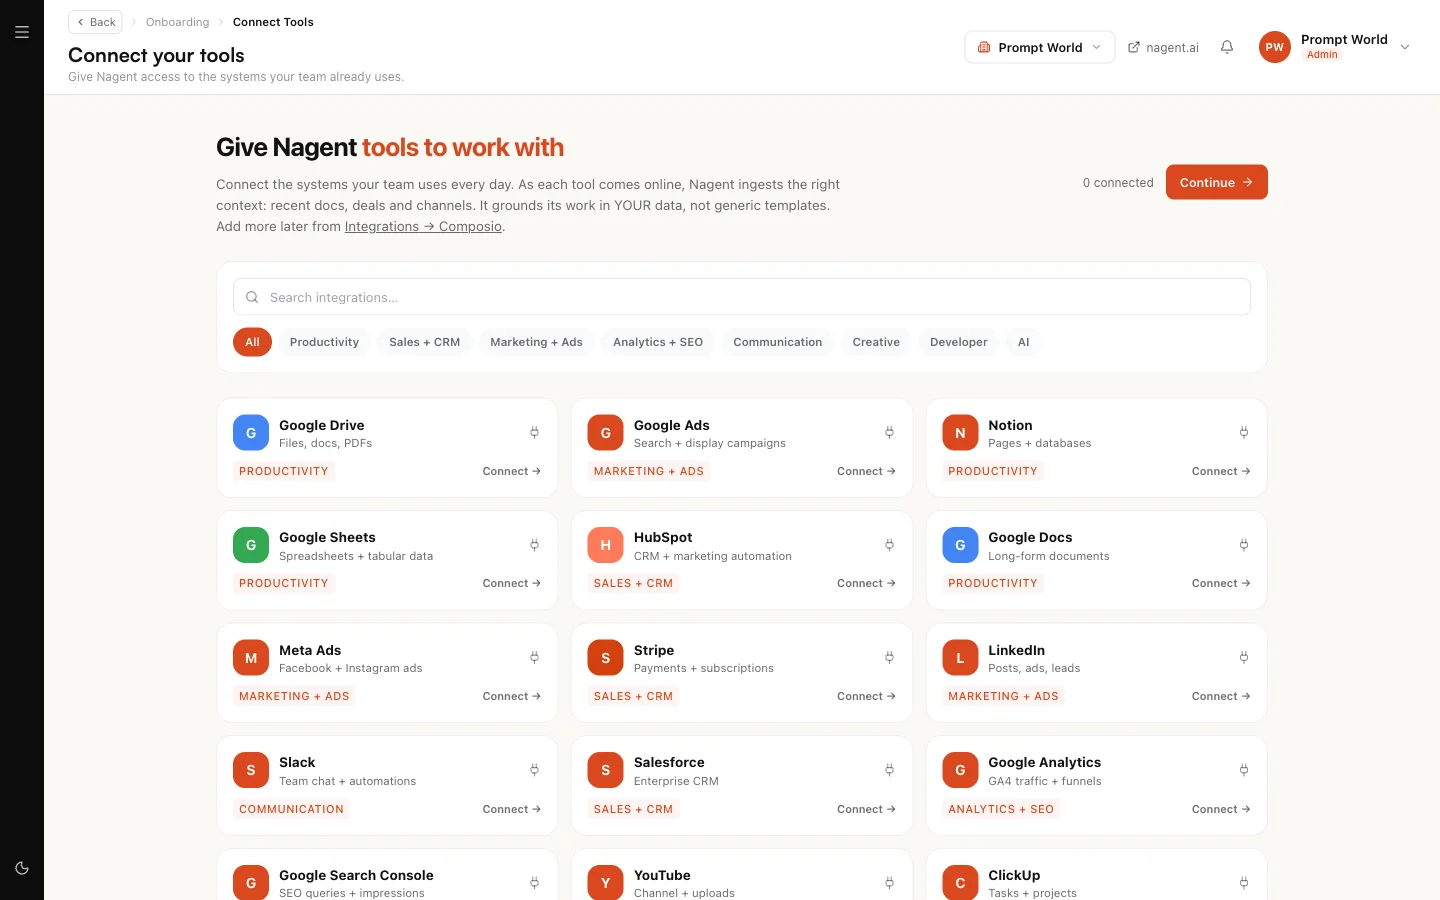
The page's subtitle mentions keys for agent tool execution, but there is no tool key field on it today. Every workspace uses the shared Nagent account for tool execution. Your own tool connections, such as your CRM, calendar or email, are authorised under your workspace when you connect them, and nobody else's workspace can use them. Connect tools from Connect your tools; see Third-party tools and Tools and integrations.
The site connection (Beta)
The second card, Site connection, issues the key your own website uses to read the fixes you approve on the Proposals page. The key is shown once, when it is issued; after that only its last four characters exist anywhere. You can rotate or revoke it. The card cannot see whether your site is actually reading the key, so it says so rather than claiming a connection. The developer steps are in Connect your site.
Who can do this
Anyone with settings read permission can open the page. Saving or removing a key, checking the domain, and issuing the site key need settings write permission, which a workspace admin has.
Where to go next
- Triggers and webhooks: let outside services start work in your workspace.
- Third-party tools: connect a tool and choose what agents may do with it.
- Connect your site: put approved fixes on your website.